Capacity planning
Updated
Capacity planning helps your team see how much work fits into the next sprints before you commit to it. Scrumpy compares the work you plan with the capacity your team really has, so the conversation starts from numbers instead of guesses.
Start with the sprints you finished
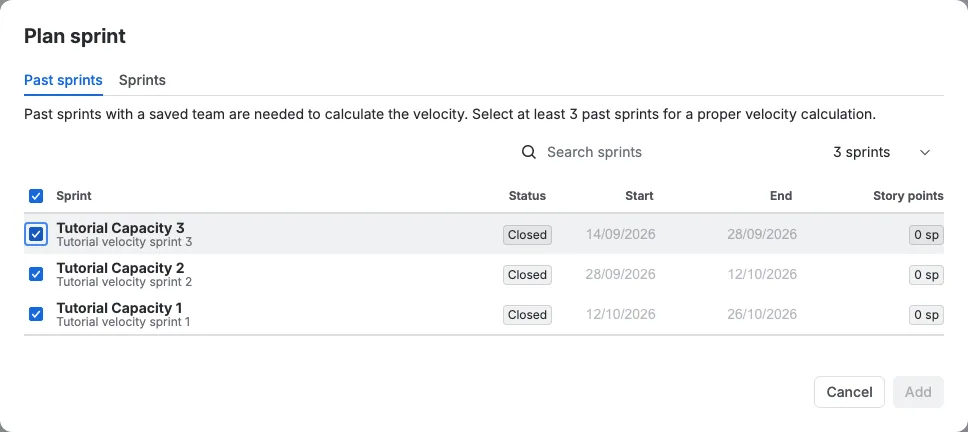
Open the space page and choose the Capacity planning tab. Select your planning session, then select Plan sprint. In the Past sprints tab, tick the closed sprints that should set your team's velocity. Three past sprints give a steady average. Each past sprint should include the work the team completed, and its team should be filled in.
If you are starting for the first time and there are no past sprints, you can still plan. Add the team to the sprint you want to plan, set each person's utilization and hours of work, and Scrumpy calculates the target from that team. Add past sprints later to get a velocity.
Add the active and future sprints you want to plan
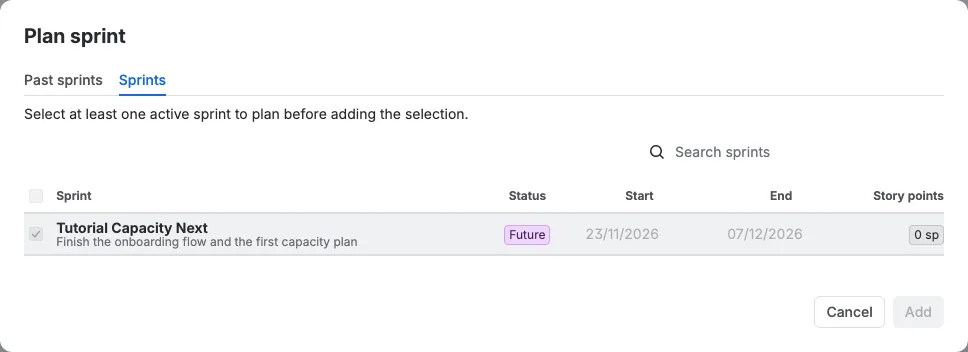
Open the Sprints tab in the same dialog and tick the active or future sprints you want to include. You can plan several sprints at once, so the team can compare the next few weeks in one view. Select Add.
The board selector decides which sprints you can plan
This part is important. The sprint picker only lists sprints that originated from the board currently chosen in the board selector at the top left of the capacity table. Switch the board and the list changes. Each board keeps its own plan, so choose the board first, then add its sprints.
Add and remove work items
With a sprint selected in the table, use Add from filter to bring in work items from a saved Jira filter, a sprint, or a Refinement/grooming session. Drag a work item to reorder it inside its sprint, or drag it onto another sprint row to move it. To remove items, tick them and select Remove. Removing an item changes the plan, not Jira, until you select Apply.
Read the capacity timeline
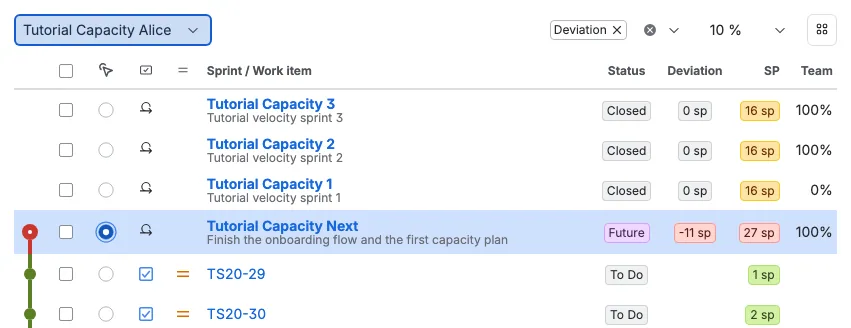
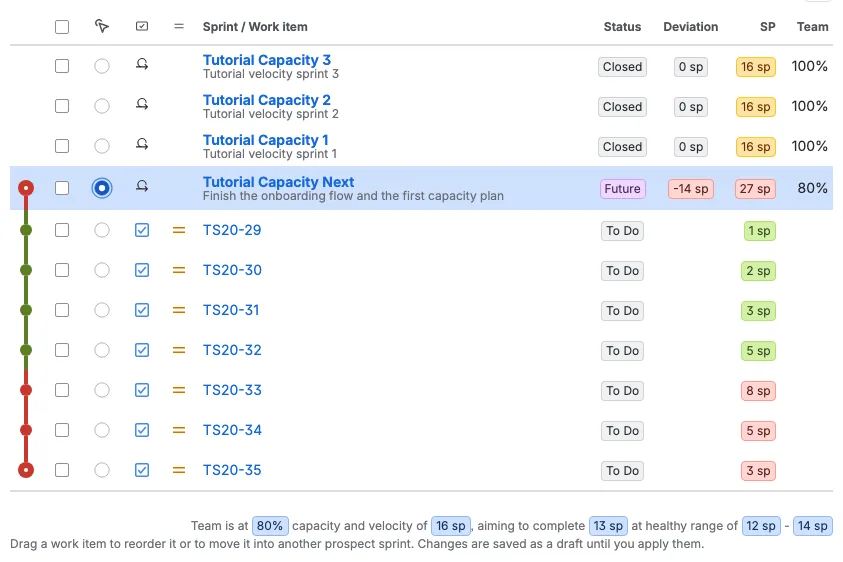
In this example the planned sprint has seven work items. Their estimates are 1, 2, 3, 5, 8, 5, and 3 story points. The timeline adds them up as you read down the table. Green means there is room, yellow means you are close to the healthy range, and red means the running total is above the capacity your team has.
If the later work items sit behind a red line, the plan is too big for this team. Remove an item, lower an estimate, or add capacity before you start the sprint.
Set up the team
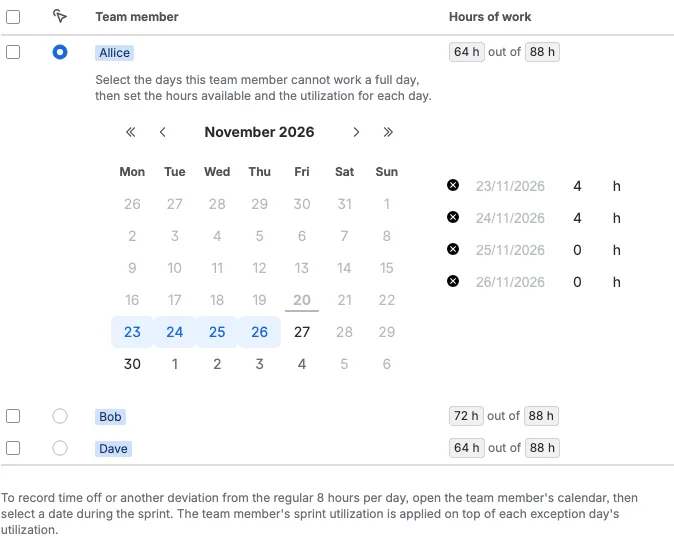
Open the Team capacity tab. This example has three team members. Each person has a utilization percentage and hours of work for the sprint. Time off is added in the person's calendar. When you change a value, the target and the timeline update right away.
Agree on the sprint goal
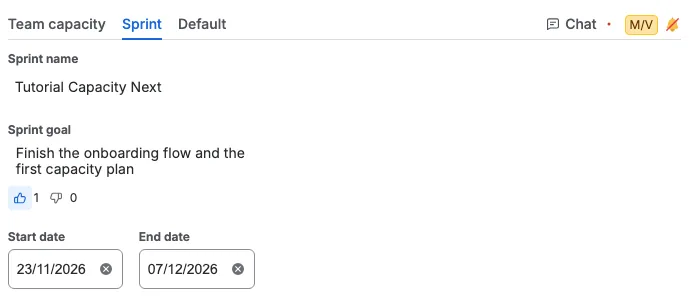
Open the Sprint tab to write the sprint goal. Everyone can vote with the thumbs up and thumbs down buttons, and the counts update for the whole team. A clear goal helps the team agree on what the sprint is for before voting starts.
Vote on a work item and chat
Select a work item in the table, then open a perspective tab to vote with the same cards you use in Refinement/grooming. A Chat tab appears for the selected work item, so the team can discuss that item without leaving the capacity plan.