Voting with custom cards
Updated
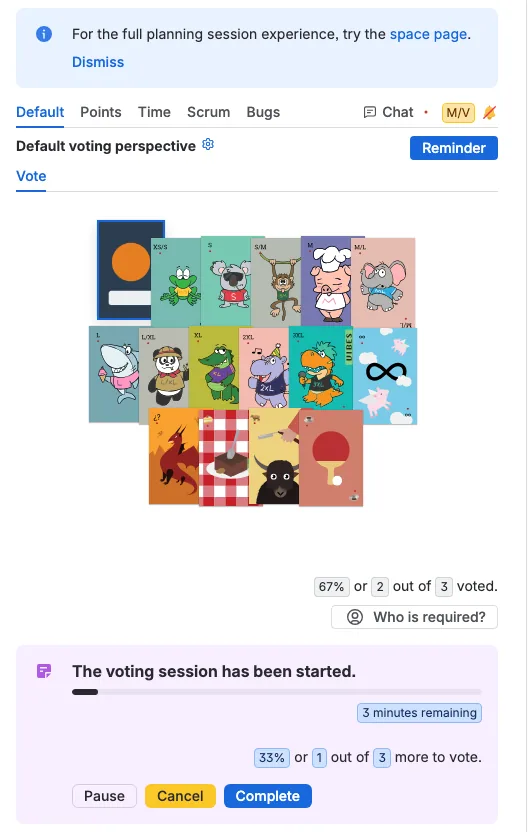
You can re-brand the whole voting board to match the team's standards: the card values, the titles, the story points on a T-shirt deck, and the artwork. Voters then see a deck that speaks the team's language instead of the built-in one.
Every card set is customizable
Titles and custom images work on every card-based sequence: Regular, Fibonacci, Tens, Fingers, Dice, and T-Shirt. Pick the sequence first, then change its titles, choose the active cards, and upload artwork. The same steps apply to each set.
T-Shirt adds one more setting. Its cards are size labels instead of numbers, so each size also has an editable story point value. The other card sets already carry a fixed number on every card, so they do not show a story point field.
This tutorial uses a T-shirt perspective because it shows both customizations, but you can follow the title and image steps on any card set.
Start with a T-shirt perspective
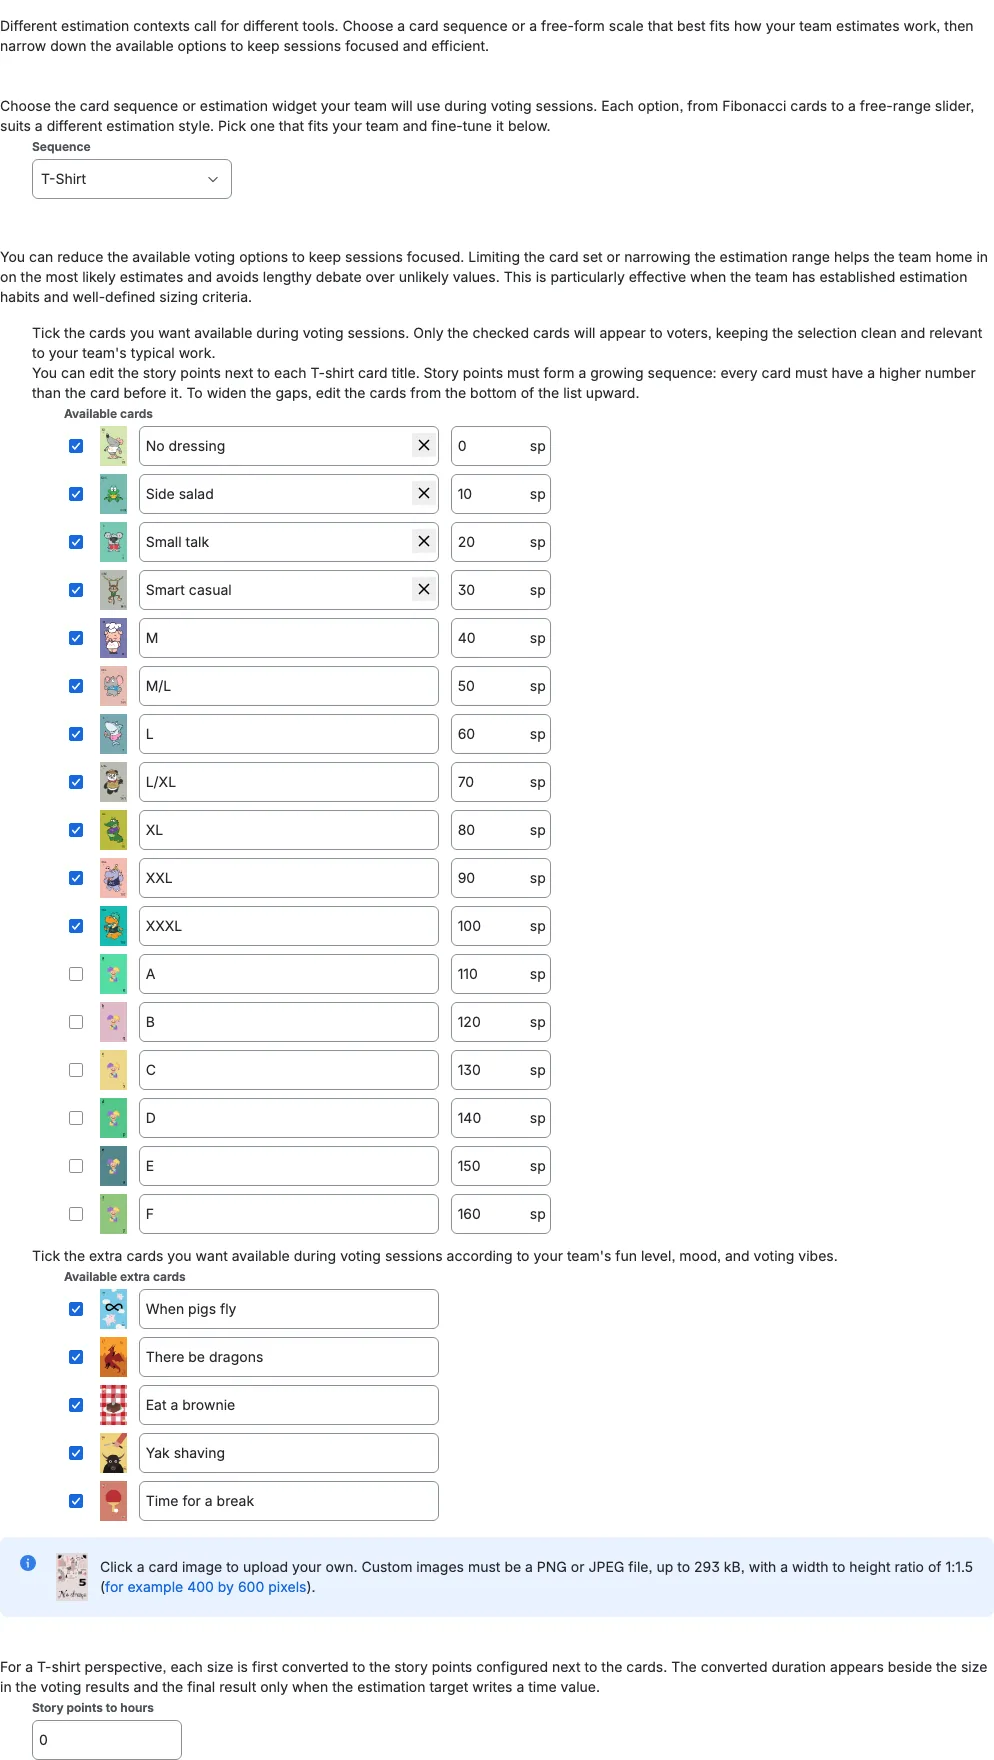
Open the perspective settings and choose T-Shirt in Sequence. Tick the sizes the team uses under Available cards. Only the ticked cards appear during voting, so a short list keeps the session focused.
Change the titles, and the story points on T-Shirt
Each card has a title field beside its preview. Replace the built-in title with the team's own name for that card. A custom title must contain at least one letter and must be unique within the sequence; the small reset control restores the built-in title. This works the same on every card set.
On T-Shirt, each size also has a story point value. Set the numbers so they grow from the first card to the last, and edit from the bottom upward when you need wider gaps. These values are what Scrumpy uses for the result and for the Jira story points field. The other card sets keep their fixed numeric value and show no story point field.
Upload custom card images
Click any card preview in Available cards or Available extra cards to open the upload dialog. This works on every card set. Choose a PNG or JPG image up to 293 kB with a width to height ratio of 1:1.5, for example 400 by 600 pixels. The same dialog removes a custom image and restores the built-in artwork.
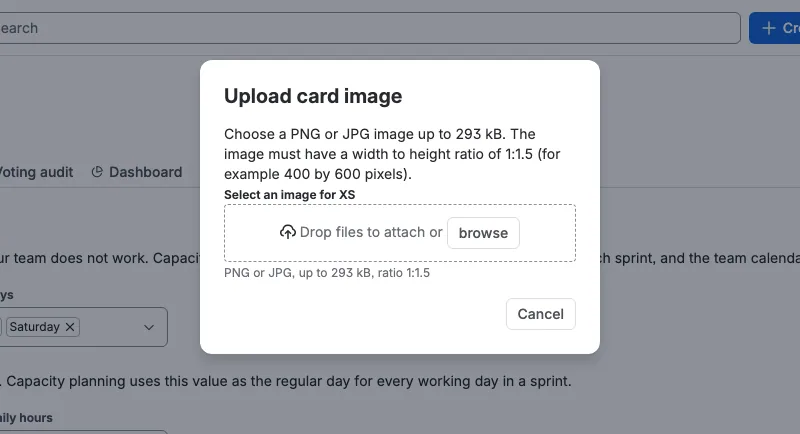
Custom images are kept per card and per sequence, so the same value in two sequences can carry different artwork. Only people who can manage the space can upload or remove an image, and the image belongs to this space.
Vote with the custom board
When a session runs, voters see the custom titles and artwork on the cards they can pick. A custom title also appears in the card tooltip and replaces the value on the minimalistic card visuals. The moderator starts, pauses, resumes, or completes the session as usual, and the accepted estimate uses the story point value behind the chosen card.